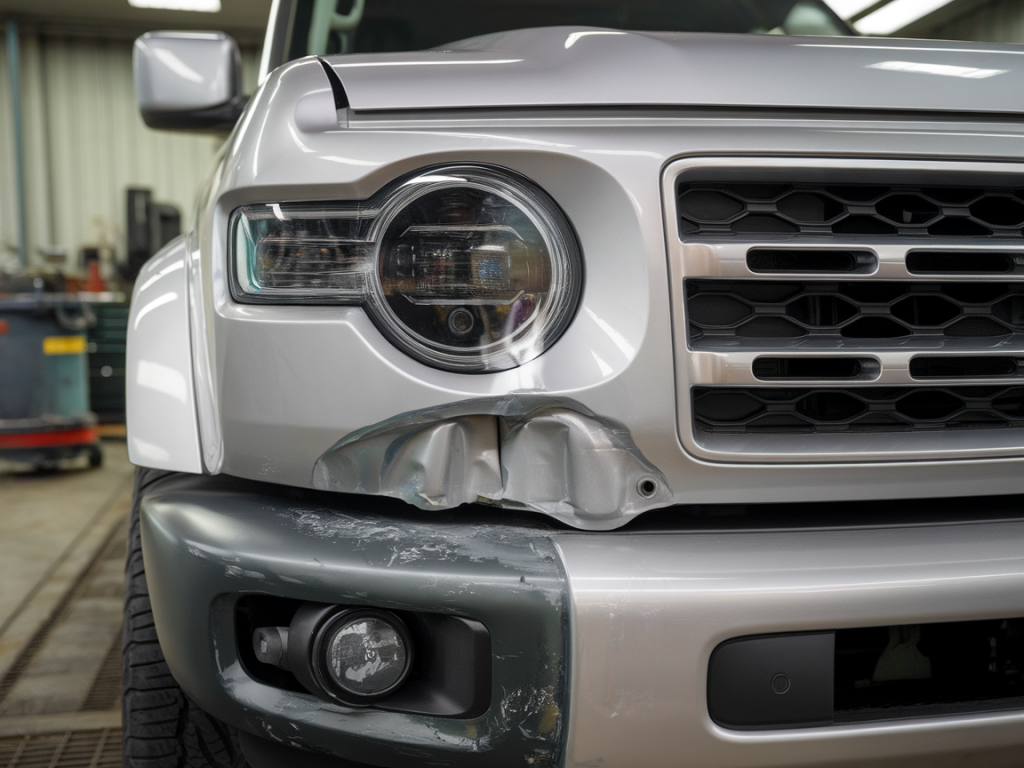
I remember the first time I bought a used SUV that looked perfect on the lot — glossy paint, clean panels, no visible dents. A week after buying it I noticed uneven gaps and a faint smell of glue behind the trim. That car had a hidden past. Since then I’ve made a habit of inspecting paint repairs carefully before handing over money. Below I’ll walk you through the exact inspection I use to spot sloppy paintwork that may be hiding accident damage, so you can avoid surprises and negotiate from a position of knowledge.
Why paint repairs matter
Paint hides a lot. A proper repair fixes structure and finishes the job so it’s safe and looks factory-new. A sloppy paint repair, on the other hand, can mask bent metal, poor welding, mismatched panels, or unrepaired rust. That affects safety, resale value, and long-term durability. I’m not suggesting every repair is bad — good bodywork is often cheaper than the alternative — but spotting poor repairs before purchase is essential.
Tools I always bring to an inspection
You don’t need a body shop’s gear to spot problems. These are the items I keep in the glovebox or trunk for pre-purchase checks:
Start with a distance inspection
Before touching anything, walk around the SUV at arm’s length and at a few steps back. This gives you a sense of overall finish and consistency.
Edge checks — where repairs are easiest to hide
Edges of doors, trunks, liftgates, under bumpers and wheel arches are favorite hiding places. I pay special attention to these:
Use light at an angle
A strong LED flashlight held at a shallow angle to the surface reveals ripples, high and low spots, and sanding scratches you won’t see under normal light. I sweep the beam slowly along panels, following reflections to detect irregularities.
Magnet test for filler and bodywork
A small magnet is one of the simplest, most effective tools. It tells you where metal is missing or non-ferrous materials were used.
Measure paint thickness
A paint cross-section gauge is the most objective way to spot repainting. Factory paint thickness is consistent across panels; repairs often show increased depth.
Inspect gaps and panel alignment
Factory gaps are uniform. Accident repairs, especially poor ones, leave telltale signs:
Look under trim and behind seals
Use your plastic pry tool to gently lift rubber trim and weather seals. Don’t force things, but look for:
Check fasteners, screw heads and rivets
Factory screws and rivets have a consistent finish. Signs to watch for:
Interior clues
Damage can reach inside. I always open glovebox, remove trunk liners, and inspect carpet and upholstery seams.
Smell and feel
Trust your nose. New paint has a distinct smell; excessive solvent odor inside the cabin or trunk could mean sprayed-in repairs. Sticky or tacky textures in the trunk or under trims hint at rushed drying or cheap coatings.
Ask pointed questions — and listen
If you find anything suspicious, ask the seller these direct questions:
Pay attention to hesitation, vague answers, or unwillingness to provide documentation — those are often as telling as physical signs.
When to walk away or get professional help
If you encounter multiple red flags — mismatched paint, thick filler detected by magnet or gauge, inconsistent gaps, and odd smells — I usually recommend either a professional inspection or walking away. A certified body shop can give a detailed report and cost estimate for proper repairs. If you love the vehicle but suspect structural damage, get a frame alignment check and a paint meter reading before finalizing anything.
Rough cost considerations
To help you decide whether a repair history is acceptable, here are typical ballpark figures:
| Minor panel repaint (single door or fender) | $150–$500 |
| Bumper repair or replacement | $200–$1,000 (depending on sensors & paint) |
| Full panel replacement (fender/door) | $500–$1,500 |
| Structural/frame repair | $1,500–$10,000+ |
These ranges vary by region and vehicle. If repair estimates approach or exceed the discount you’re getting on the price, it’s usually not worth the risk.
Finally, document everything with photos. If you decide to buy, get written confirmation of any guarantees, full repair receipts, and a pre-purchase inspection report. That documentation protects you later and gives leverage for negotiation.