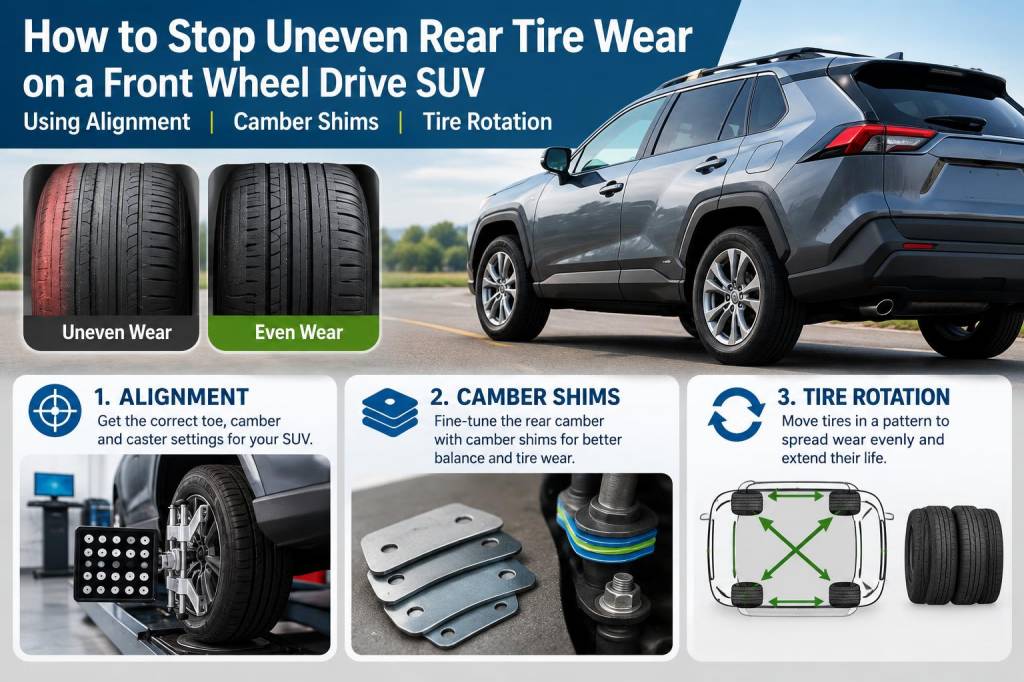
I started seeing odd feathering and inner-edge wear on the rear tires of my front-wheel-drive SUV after about 30,000 miles. It looked like the rear was being punished for something the front was doing. If you’ve noticed similar wear patterns—especially on the inner edges of rear tires on a FWD SUV—you’re not imagining it. In this piece I’ll walk you through why this happens, how to diagnose the problem, and practical steps using alignment, camber shims, and tire rotation to stop the wear and get your tires lasting longer.
Why rear tires on a FWD SUV wear unevenly
There are a few recurring reasons I’ve seen behind uneven rear tire wear on front-wheel-drive SUVs:
Incorrect rear camber — Many FWD SUVs have a rear suspension setup where camber can become negative over time, causing inner-edge wear.Toe misalignment — Rear toe that’s out of spec causes scrubbing at speed and leads to feathering or scalloped wear.Worn suspension components — Bushings, trailing arms, or shocks can let the wheel move under load and change alignment dynamically.Load and driving habits — Constantly carrying heavy loads or frequently driving on rough roads can accelerate wear.Improper tire rotation — Not rotating tires often enough—or using the wrong rotation pattern—lets front-driven tires wear differently from rears and can compound alignment issues.In my experience, the most common combination is a bit of negative camber plus rear toe that's slightly off, often worsened by aging bushings. Fixing just one element sometimes reduces the damage, but to stop uneven wear permanently you need a coordinated approach: alignment, mechanical checks/repairs, and a disciplined rotation program.
Diagnosing the problem: what to check first
Before you drop money on parts or shop time, confirm the pattern and rule out wear caused simply by old tires.
Inspect the tread visually and by hand. Run your fingers across the tread to feel feathering. Inner-edge wear is usually camber-related.Check tire pressure and history. Underinflation can exaggerate inner-edge wear; make sure tires have been maintained.Have a shop or use a DIY camber gauge to measure rear camber and toe. Compare to the factory spec in the service manual or online—manufacturers often list rear camber tolerances that are fairly tight.Check suspension parts: bushings, control arms, shocks/struts, and the rear subframe for corrosion or bending. Worn bushings often allow the wheel to gain negative camber under load.I’ve found that a pre-alignment inspection by a reliable shop is worth the cost. Once they verify measurements and point to worn components, you can decide whether to repair or temporarily correct using shims.
How camber shims work and when to use them
Camber shims are thin, often wedge-shaped plates you install between suspension mounting points—typically at control arm bushings—to adjust the wheel’s camber without changing the arm geometry. I’ve used shims on older SUVs where the subframe or bushings have settled and replacing everything wasn’t practical immediately.
When to use shims: When camber is out of spec and suspension components are otherwise in good condition, or as a temporary fix after replacing bushings while waiting to address a larger issue.When not to use shims: If bushings or arms are badly worn, or if the subframe is bent. Shims can hide underlying problems and lead to unpredictable handling.Shims can correct a couple of degrees of camber. For many FWD SUVs, moving camber from, say, -1.5° to -0.3° can make a huge difference in rear wear rates. However, added camber correction without proper toe correction can still leave you with feathering, so don’t skip a full alignment afterwards.
Step-by-step: stopping uneven rear tire wear
Here’s the practical sequence I follow when tackling this on a FWD SUV:
1. Inspect and repair suspension components. Replace worn bushings, control arms, or shocks. New hardware gives a stable baseline for alignment and shims to work from.2. Measure current alignment. Get a pre-adjustment printout. Note rear camber and toe, and compare with specs.3. Install camber shims if needed. Use shims to bring camber into spec. I prefer stainless or high-quality powder-coated shims—cheap steel shim sets can rust and move.4. Adjust rear toe. Toe is critical for preventing feathering. On many FWD SUVs this requires adjustment at the toe links or an eccentric bolt; ensure toe is centered per spec.5. Perform a full four-wheel alignment. Even if it’s technically a rear correction, a complete alignment ensures the front and rear work together. I go to a shop with a calibrated Hunter or John Bean machine.6. Rotate tires on a regular schedule. Follow the manufacturer’s rotation pattern for directional vs non-directional tires. For most AWD/FWD cars I use a rearward cross or X-pattern rotation every 5,000–7,500 miles.7. Monitor and recheck after 500–1,000 miles. Drive for a short period and re-check alignment and wear. Shims can settle and bolts can torque differently after a few heat/cool cycles.Rotation patterns and frequency
Tire rotation is the cheapest way to balance wear between driven and non-driven axles. My go-to rules:
If tires are non-directional and you have a full-size spare: use a rearward cross (rear tires move to front on same side; front tires cross to rear opposite sides).If tires are directional: front-to-rear on the same side.Rotate every 5,000–7,500 miles—often right when you change oil.Keeping a log of rotations and alignments helps identify problems early. If one rear tire keeps showing inner-edge wear despite alignment and shims, it’s a red flag for intermittent suspension play or bent components.
Tools, parts, and recommended products
When I do this work in my garage I keep a few reliable items on hand:
Camber shims kit (specific to vehicle or universal wedge shims) — I’ve used SPC and Whiteline kits for adjustability.Torque wrench and thread locker for safety.Quality alignment shop access — a proper alignment machine beats DIY jig setups for accuracy.Replacement bushings/control arms from Moog or OEM suppliers when needed.Tire pressure gauge and tread depth tool for ongoing checks. | Item | Reason |
| Camber shims (stainless) | Correct negative camber without major part replacement |
| Quality new bushings/control arms | Eliminate play and ensure consistent alignment |
| Professional alignment | Accurate camber/toe settings and printout for records |
Common mistakes to avoid
From my own trials and from working with readers, here are pitfalls I see:
Relying solely on shims without addressing worn bushings — it’s a band-aid.Skipping a full alignment after installing shims — camber change can affect toe.Rotating tires irregularly—or not at all—letting front drive bias dominate wear patterns.Using one wheel’s wear pattern to diagnose whole-vehicle alignment. Always compare both rear tires.If you follow a methodical approach—inspect and repair suspension components, correctly install shims when appropriate, set rear toe and camber to spec, and rotate tires regularly—you’ll halt the inner-edge murder-suicide on your rear tires and extend their life. I’ve seen SUVs go from needing rear tires every 25k miles to getting full 50–60k-mile life after tackling these steps right.