I recently helped a friend with a 2016 Honda CR-V that developed a hovering brake pedal after a routine brake fluid change. The pedal would sink slightly when pressed, then slowly rise back to a higher-than-normal idle position instead of returning firmly. If you’ve ever bled the brakes on a CR-V (or had it done) and ended up with a soft, floating, or “hovering” pedal, I’ll walk you through what I learned, what to check, and how to fix it. I’ll keep it practical — the aim is to get you back on the road with a confident, solid pedal.
What “hovering” means and why it’s dangerous
When I say a pedal is “hovering,” I mean it doesn’t return to a firm, consistent rest position after a stop or after pumping it. Instead it slowly rises or feels spongy and inconsistent. That’s more than annoying — it indicates air, leaking seals, or an ABS or booster problem that can reduce braking performance and increase stopping distances. Don’t ignore it.
Most common causes after a brake fluid change
After a fluid change, the usual suspects are:
- Air trapped in the brake lines — the most common issue. Even a small bubble can compress and cause a spongy or hovering pedal.
- Incomplete bleeding procedure — modern ABS modules and proportioning valves can trap air unless bled with the correct sequence or ABS cycle.
- Master cylinder not bench-bled or bled correctly — if the master cylinder was disturbed, it can harbor air.
- Brake booster or vacuum leak — a booster leak usually causes a hard pedal when the engine is off and soft or inconsistent when running, but symptoms can vary.
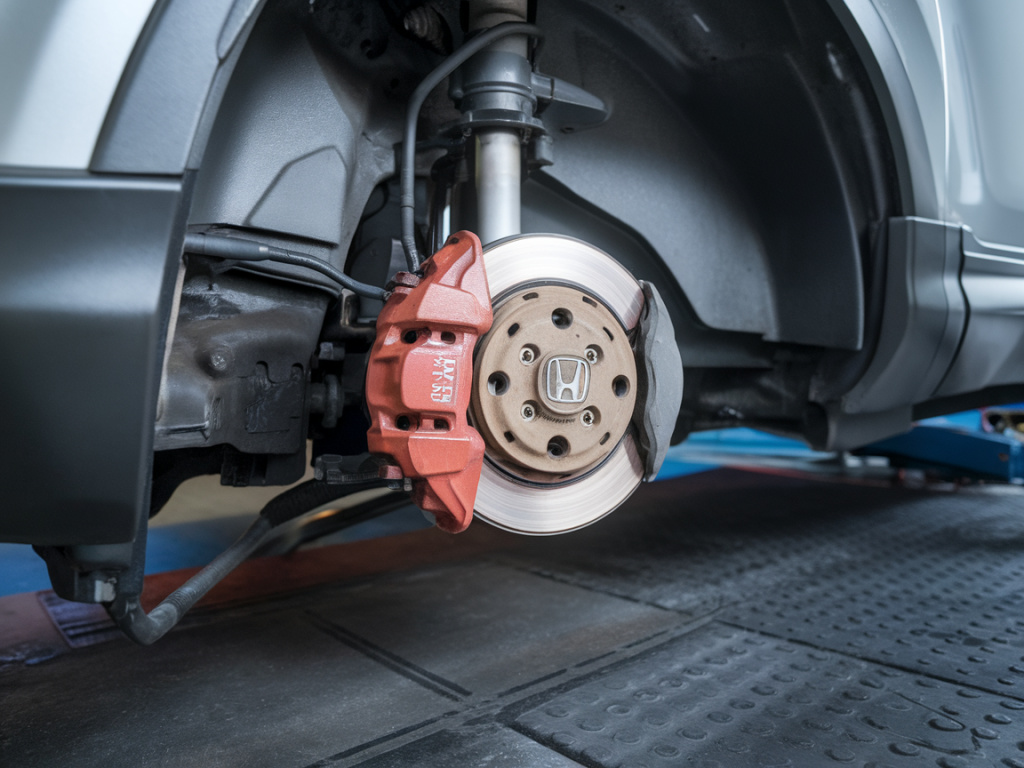
- Caliper pistons or slide pins sticking — uneven retraction can cause pedal feel changes.
- ABS module trapped air — requires a scan tool or ABS bleed cycle to purge.
Tools and supplies I recommend
- Clear tubing and a catch bottle (for manual bleeding)
- Brake bleeder wrench or line wrench set
- Helper (recommended) or a pressure/vacuum bleeder like Mityvac
- OBD2 scan tool with ABS bleed capability (or take it to a shop with one)
- DOT 3 or DOT 4 brake fluid as specified in your owner’s manual (I use Motul or ATE for reliability)
- Brake cleaner, rags, gloves, and safety glasses
Step-by-step troubleshooting and fixes I follow
Start simple and work toward the more complex. Here’s my step-by-step approach.
1. Check for leaks and obvious issues
- Look under the car for fresh fluid drips around calipers, wheel cylinders, brake lines, and the master cylinder reservoir. A leak will introduce air and must be repaired first.
- Open the master cylinder reservoir and inspect the fluid level and color. If it’s low, top to the proper level — low fluid often indicates air in the system.
- Check the brake booster vacuum hose for cracks or loose clamps.
2. Confirm pedal behavior (engine on vs off)
I always test pedal feel with the engine off and then with it running. If the pedal is hard with the engine off and soft when running, that suggests the booster is functioning but there may be air in the hydraulic system. If the pedal is hard both ways, suspect master cylinder or mechanical issue. If it’s soft both ways, think air or a failing master cylinder.
3. Manual bench-bleed the master cylinder (if it was removed or disturbed)
If the master cylinder was removed during the fluid change or you suspect it’s full of air, bench-bleeding before reinstalling helps. I’ll paraphrase the basic steps:
- Clamp the master cylinder in a vise (use soft jaws) and install bleed fittings with clear tubing returning to the reservoir.
- Use a screwdriver to slowly depress the piston and watch for bubbles in the tubing until none appear.
- Refill the reservoir as needed so it never runs dry.
4. Bleed the brakes in the correct order
On many Hondas the recommended sequence is farthest wheel first — usually right rear, left rear, right front, left front — but check your owner’s manual. I always follow the manual’s sequence. Have your helper pump the pedal slowly and hold while you open the bleed nipple until fluid runs clear and bubble-free, then close, then repeat until the pedal feels firm. Don’t let the reservoir go dry.
5. Use a pressure or vacuum bleeder if you can
A Mityvac or handheld bleeder can make the job far easier and more consistent. These devices pull fluid from the caliper back to the reservoir and often do a better job removing tiny air bubbles than manual pumping.
6. Purge the ABS module if necessary
This is a common reason for hovering pedals after a fluid change. The ABS hydraulic control unit can trap air. Some scan tools (like Autel or Snap-On) have an ABS bleeding function that cycles the ABS valves while bleeding. If you don’t have a scan tool with that function, a shop or dealer can perform the ABS bleed. It’s often the step that fixes hover when everything else failed.
7. Inspect the master cylinder for internal leaks
If you’ve bled everything and the pedal still rises slowly or hovers, the master cylinder could have internal bypassing seals. One test: with the engine off and parking brake set, press the brake pedal and hold pressure for 30 seconds—if the pedal slowly sinks to the floor or rises back inconsistently, the master cylinder may be internally leaking and needs replacement.
8. Check caliper operation and slide pins
If one wheel’s caliper is dragging or its piston is sticking, braking pressure can be uneven and affect pedal feel. Remove the wheel, inspect the caliper boots and pins, clean and lube slide pins with high-temperature brake grease, and ensure pistons move freely. Replace any corroded hardware.
When I use a table: fluid specifications (example)
| Model years (example) | Brake fluid type |
| Honda CR-V (2012–2016) | DOT 3 or DOT 4 (consult owner’s manual) |
Practical tips I always follow
- Never mix DOT 5 (silicone) with DOT 3/4 — they’re incompatible.
- Keep the reservoir topped up during bleeding to prevent sucking air back in.
- Work on one wheel at a time and cap the other nipples to avoid contamination.
- Use clear tubing so you can see bubbles; small bubbles can be the difference between success and continued hovering.
- If in doubt, have the ABS bled professionally — that often saves time and gives peace of mind.
When to take it to a shop
If you’ve bled the system, bench-bled the master cylinder, checked for leaks, and the pedal still hovers, it’s time to involve a professional. Shops have the proper scan tools to run ABS cycles and can pressure-test the system. Also consider a shop if you suspect the master cylinder or ABS unit needs replacement — both are safety-critical components.
On my friend’s CR-V, the fix turned out to be an ABS module bleed using a scan tool. After the ABS cycle and a final bleed, the pedal returned to a firm, predictable feel. That experience reinforced something I always tell readers: bleeding brakes is more than just “pump and open” on modern cars — system-specific procedures and ABS purging are often required. If you follow the steps above methodically, you’ll either resolve the issue or gather the right information to hand over to a professional.